Convert HTML to WordPress: A Step-by-Step Guide

Staring at your perfectly crafted HTML website and wondering how to get it working on WordPress? You're definitely not alone in this puzzle! Many website owners find themselves in this exact spot, caught between a static site they love and the dynamic functionality that WordPress brings to the table. The good news is that converting HTML to WordPress doesn't have to be a hair-pulling experience.
Whether you're a web developer looking to expand your skills, a business owner ready to take control of your content, or someone who inherited a beaut

iful HTML site that needs more flexibility, this guide will walk you through the entire process. We'll cover both manual conversion methods for those who like getting their hands dirty with code, and automated solutions for folks who prefer a more streamlined approach.
By the end of this tutorial, you'll understand exactly how to transform your static HTML into a fully functional WordPress theme while keeping all those design elements you worked so hard to perfect. Ready to bridge the gap between static and dynamic? High-five, because we're about to make this happen!
The HTML to WordPress Conversion Process
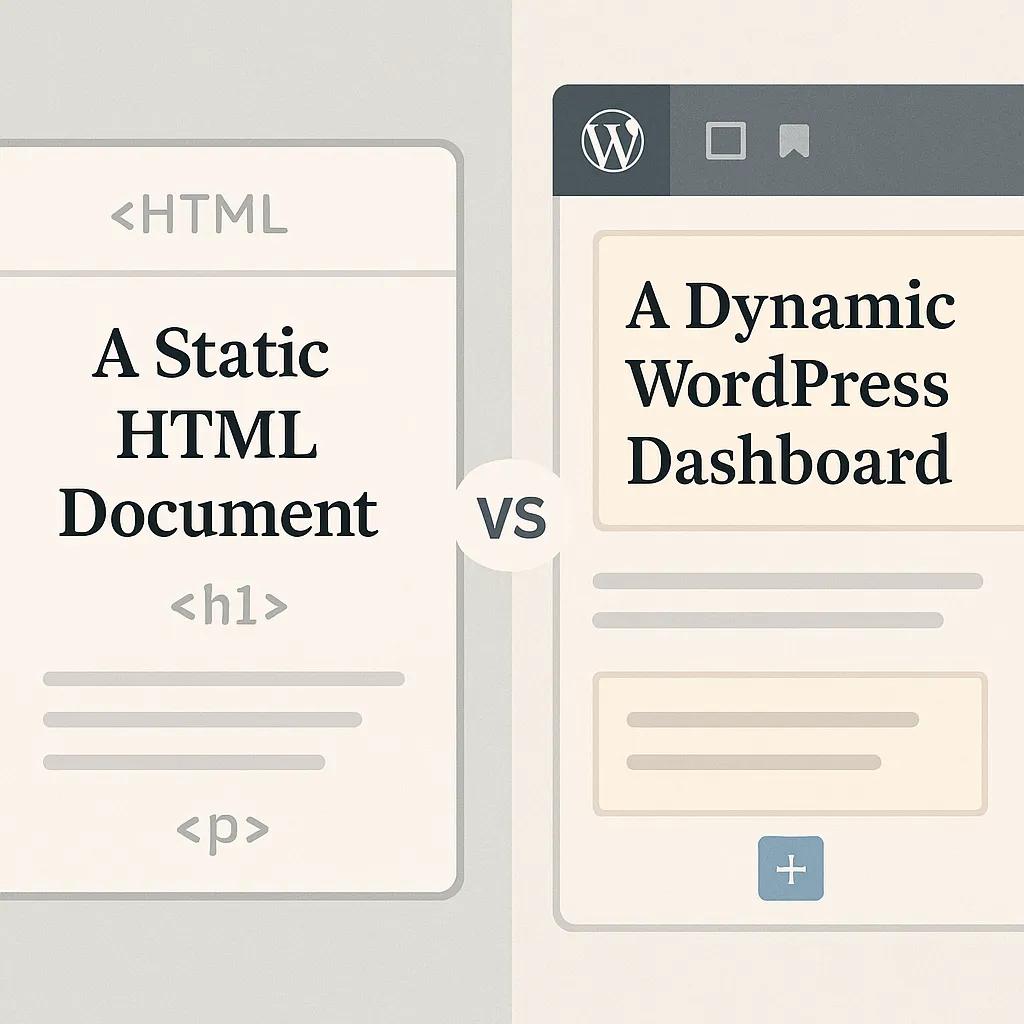
Before we jump into the technical steps, it's important to get a solid grasp on what we're actually doing here. Converting HTML to WordPress isn't just about copying and pasting code, it's about transforming a static website into a dynamic content management system that you can update without touching a single line of code.
Think of your current HTML website as a beautiful printed brochure. Every time you want to change something, you need to redesign and reprint the whole thing. WordPress, on the other hand, is like having a digital magazine where you can swap out articles, images, and content whenever you want. The conversion process takes your brochure design and turns it into that flexible magazine format.
The process involves breaking down your HTML structure into template parts that WordPress can understand and use. Your header becomes a header.php file, your footer becomes footer.php, and your main content area gets transformed into various template files that can dynamically pull content from your WordPress database. It's pretty neat how it all works together!
Header section
- WordPress Equivalent: header.php
- Purpose: Site navigation and branding
Footer section
- WordPress Equivalent: footer.php
- Purpose: Site-wide footer content
Main content
- WordPress Equivalent: index.php
- Purpose: Dynamic content display
Sidebar
- WordPress Equivalent: sidebar.php
- Purpose: Widget areas and secondary content
CSS styles
- WordPress Equivalent: style.css + functions.php
- Purpose: Theme styling and functionality

Manual vs Automated Conversion: Which Path Should You Take?
Here's where things get interesting. You've got two main routes for this conversion journey, and both have their merits. Manual conversion gives you complete control over every aspect of your theme, perfect for those who want pixel-perfect results and aren't afraid of some code. Automated tools can speed things up considerably but might not capture all the nuances of your original design.
If you're working with a complex layout or have specific functionality requirements, manual conversion is usually your best bet. For simpler sites or when you're working against tight deadlines, automated tools can be a real lifesaver. Understanding how CSS links to HTML will definitely help you make the right choice for your project.
Manual Conversion
- Pros: Full control; custom features; pixel-perfect results
- Cons: Time-consuming; requires technical knowledge
- Best For: Developers; custom projects
Page Builders
- Pros: Visual editing; intuitive interface
- Cons: May not match complex designs
- Best For: Small business owners
Setting Up Your Development Environment
Alright, time to roll up our sleeves and get our workspace ready! The first step in any successful HTML to WordPress conversion is creating a safe space where you can test, break things, and fix them without affecting any live websites. Trust me, you'll thank yourself later for taking this precaution.
You'll need to install a local server environment on your computer. Popular options include XAMPP, MAMP, or Local by Flywheel. These tools create a mini web server on your machine, complete with PHP and MySQL database support (Source: Advanced Custom Fields).
Once you've got your local environment running, download and install a fresh copy of WordPress. Create a new database, run through the famous five-minute installation, and you'll have a clean WordPress site to work with. This setup process might seem like extra work, but it's absolutely essential for testing your conversion without any surprises.
Organizing Your HTML Assets
Now comes the fun part of organizing all your existing HTML files, CSS stylesheets, JavaScript files, and images into a structure that makes sense for WordPress development. Create a dedicated project folder and sort everything into logical groups (Source: Advanced Custom Fields).
Take some time to really examine your HTML structure. Look for repeating elements like headers, footers, and sidebars that will become your template parts. This organizational step might seem tedious, but it's going to save you tons of time when you start breaking everything into WordPress template files. Plus, it helps you spot any potential issues before they become bigger problems.
- Create separate folders for CSS, JavaScript, and image files
- Document any special functionality or interactive elements
- Note which pages use unique layouts or features
- List any external libraries or frameworks being used
- Identify dynamic content areas that will need WordPress integration

Creating Your WordPress Theme Structure
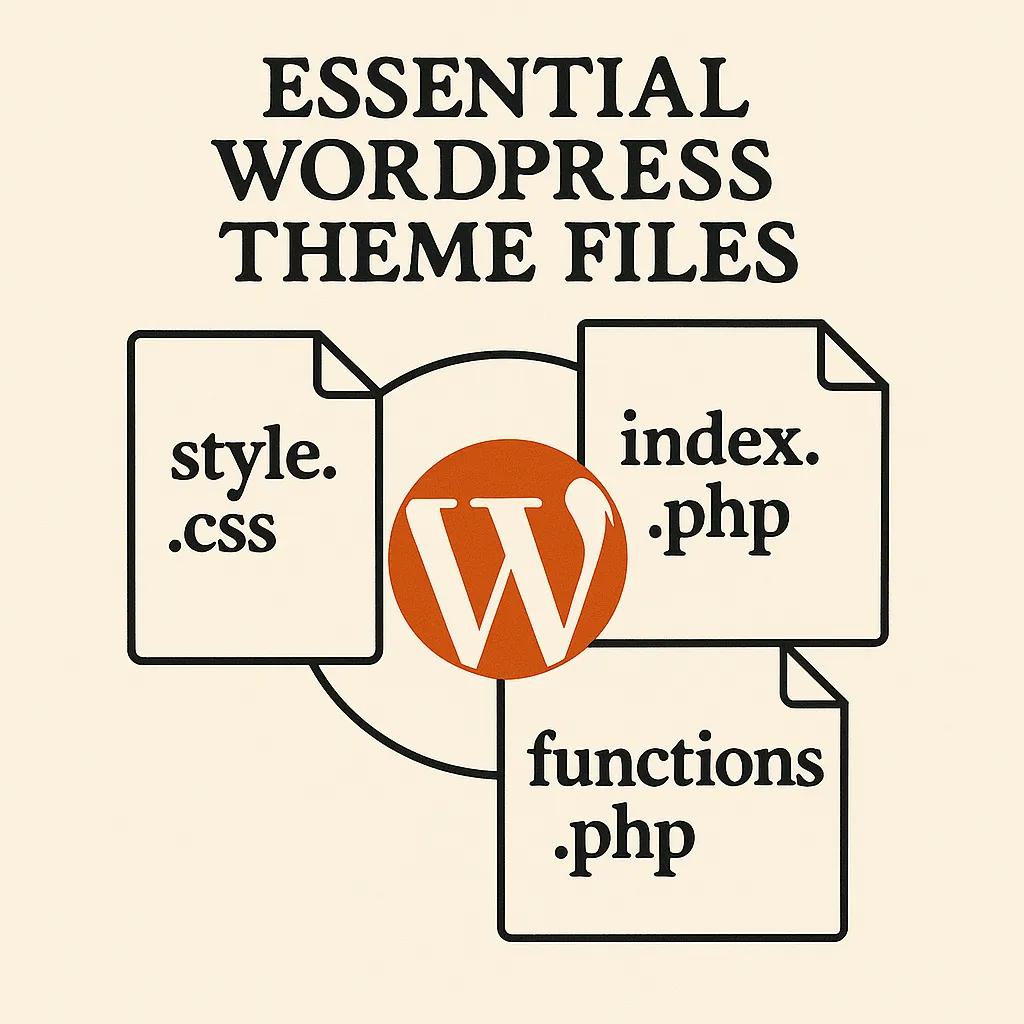
Here's where the magic starts happening! Every WordPress theme needs a basic file structure to function properly. At the absolute minimum, you'll need three files: style.css (with proper theme metadata), index.php, and functions.php (Source: Advanced Custom Fields). These files work together to tell WordPress how to display your content and what features your theme supports.
Navigate to your WordPress installation's wp-content/themes folder and create a new directory for your theme. Give it a descriptive name without spaces (underscores or hyphens work great). This folder will house all your theme files and become the foundation of your converted website.
Your style.css file needs special header information that tells WordPress about your theme. It's not just a regular stylesheet, it's also a theme information file. The header comment block should include your theme name, description, version, and author information. This might seem like a small detail, but WordPress uses this information in the admin dashboard, so it's worth doing properly.
Breaking Down HTML into Template Parts
This is where your HTML conversion really takes shape. You'll need to split your monolithic HTML file into modular WordPress template files. Start with the header section, copy everything from the opening <!DOCTYPE html> to the end of your main navigation, and paste it into a new header.php file (Source: Advanced Custom Fields).
The footer gets similar treatment. Everything from your footer content area down to the closing </html> tag goes into footer.php. Your main content area becomes index.php, and if you have sidebar content, that becomes sidebar.php. This modular approach is what makes WordPress themes so flexible and powerful.
Don't forget to add the proper WordPress function calls to connect everything. Your header.php needs wp_head() just before the closing head tag, and your footer.php needs wp_footer() before the closing body tag. These functions let WordPress and plugins inject necessary code into your theme. You might be wondering about the relevance of these technologies today, and our guide on whether HTML is still relevant in web development covers exactly why these skills matter.
header.php
- WordPress Function: get_header()
- Required Elements: wp_head(), site title, navigation
footer.php
- WordPress Function: get_footer()
- Required Elements: wp_footer(), closing tags
sidebar.php
- WordPress Function: get_sidebar()
- Required Elements: dynamic_sidebar(), widget areas
index.php
- WordPress Function: Main loop
- Required Elements: The Loop, content display

Properly Enqueuing Styles and Scripts
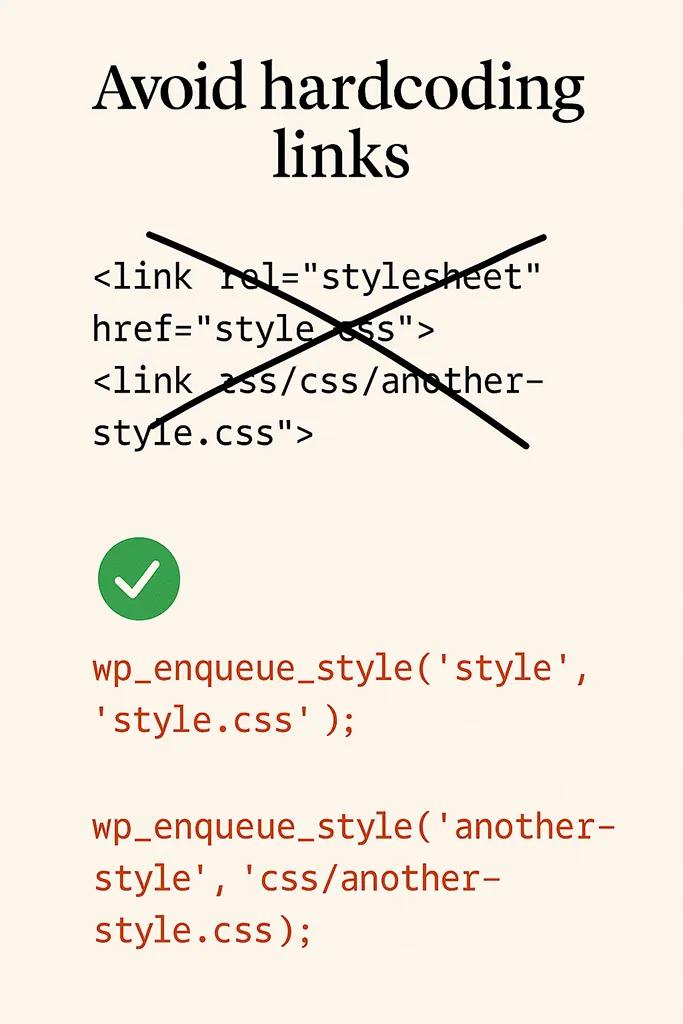
Here's a crucial step that many people skip, and it often comes back to bite them later. WordPress has a specific way of loading CSS and JavaScript files, and ignoring this system can lead to conflicts, broken layouts, and unhappy plugins. The proper method involves using WordPress functions like wp_enqueue_style() and wp_enqueue_script() in your theme's functions.php file (Source: Advanced Custom Fields).
Your functions.php file becomes the control center for your theme's functionality. This is where you'll register your stylesheets, scripts, menu locations, widget areas, and any custom features your theme supports. Think of it as the backstage area where all the technical setup happens so your theme can perform beautifully on the front end.
Never hardcode stylesheet and script links directly in your template files. WordPress needs to manage the loading order to prevent conflicts between your theme and plugins. Plus, proper enqueueing ensures your files load at the right time and in the correct order. It's a small extra step that prevents major headaches down the road.
Converting CSS for WordPress Compatibility
Your existing CSS probably works great for your static HTML site, but WordPress themes sometimes need a few adjustments. You'll want to review your selectors and make sure they'll work with WordPress-generated content. Sometimes WordPress adds its own classes or wrapper elements that might affect your styling.
Pay special attention to any absolute positioning or fixed layouts that might not play well with WordPress's responsive requirements. Modern WordPress themes need to work across all device types, so this is a perfect time to review your responsive design and make any necessary improvements (Source: Advanced Custom Fields).
Consider whether you want to stick with traditional CSS or explore using theme.json for styling your block theme. Both approaches are perfectly valid, and the choice often comes down to your personal preference and project requirements (Source: WordPress Developer News). For those working with CSS frameworks, our guide on the best CSS frameworks for beginners might help you make informed decisions.
Implementing Dynamic Content Areas
This is where your static HTML truly transforms into a dynamic WordPress theme. You'll need to replace your hardcoded content with WordPress functions that pull information from the database. The WordPress Loop becomes your best friend here, allowing your theme to display posts, pages, and custom content automatically.
Start by identifying areas in your HTML that should be dynamic. Blog post titles, content areas, dates, author information, and navigation menus all need to become database-driven. This might seem daunting at first, but WordPress provides straightforward functions for most common content types.
Your main content area will typically use The Loop to display posts or pages. Navigation menus get replaced with wp_nav_menu() functions, and static text elements become customizable through the WordPress admin. The goal is to make everything editable through the WordPress interface without requiring code changes.
- Replace static post titles with the_title()
- Convert content areas to use the_content()
- Make navigation menus dynamic with wp_nav_menu()
- Add widget areas for flexible sidebar content
- Implement featured image support where needed
Testing and Debugging Your Conversion
Now comes the moment of truth! Load up your new WordPress theme and see how it looks. Don't panic if things aren't perfect right away, this is completely normal. Conversion is an iterative process, and most developers go through several rounds of testing and refinement before everything clicks into place.
Test your theme with different types of content. Create a few blog posts, add some pages, upload images, and see how everything behaves. Check your site on different devices and browsers to ensure your responsive design is working properly (Source: CMS Minds). If you're planning to launch your site after conversion, our essential website launch checklist will help ensure you don't miss any important steps.
Pay special attention to any JavaScript functionality from your original HTML site. Sometimes interactive elements need adjustments to work properly within WordPress's environment. Document any issues you find and tackle them one at a time. This systematic approach prevents you from getting overwhelmed and helps ensure nothing gets missed.
Common Pitfalls and How to Avoid Them
Even experienced developers run into challenges during HTML to WordPress conversions, so don't feel bad if you hit a few bumps along the way. One of the most frequent issues is improperly enqueued styles and scripts, which can lead to broken layouts or plugin conflicts (Source: Advanced Custom Fields). Always use WordPress's built-in enqueuing system rather than hardcoding asset links.
Another common stumbling block is forgetting to make content areas truly dynamic. It's easy to leave some text hardcoded in template files, which defeats the purpose of using WordPress as a content management system. Take time to review every text element and ask yourself whether it should be editable through the WordPress admin.
Responsive design issues often surface during conversion, especially if your original HTML wasn't fully optimized for mobile devices. This is actually a great opportunity to improve your site's mobile experience, but it does add some extra work to the conversion process. Test thoroughly on various screen sizes and don't be afraid to make design adjustments where needed.
Broken CSS/JS
- Why It Happens: Hardcoded asset links
- How to Fix It: Use wp_enqueue functions
Static content
- Why It Happens: Forgot to add WordPress functions
- How to Fix It: Replace with dynamic functions
Plugin conflicts
- Why It Happens: Improper script loading
- How to Fix It: Follow WordPress enqueuing standards
Mobile issues
- Why It Happens: Non-responsive original design
- How to Fix It: Review and update CSS media queries
When to Consider Professional Help
Sometimes the smartest move is knowing when to bring in the experts. If you're dealing with a complex site, tight deadlines, or simply don't have the bandwidth to handle the conversion yourself, professional help can be a worthwhile investment. The cost of professional conversion often pays for itself in time saved and problems avoided.
Complex e-commerce functionality, custom integrations, or multi-language sites might be beyond the scope of a DIY conversion project. There's no shame in recognizing when a project needs professional expertise. In fact, it shows good business judgment to know when to delegate technical tasks so you can focus on what you do best.
When you're evaluating whether to tackle the conversion yourself or hire professionals, consider not just the technical complexity but also the opportunity cost of your time. Our guide on how to choose a web design agency can help if you decide professional assistance is the right path for your project. For budget-conscious business owners, we also have insights on finding affordable custom website solutions.
Alternative Approaches: WordPress vs Other Platforms
While we've focused on WordPress conversion throughout this guide, it's worth noting that WordPress isn't the only game in town. Depending on your specific needs, you might want to consider other platforms like Webflow, which offers a different approach to website management and might be easier for some conversions.
Webflow, for example, provides a visual interface that's closer to traditional web design tools, which might feel more familiar if you're coming from a static HTML background. The platform handles many technical aspects automatically while still giving you significant design control. If this sounds appealing, you might want to explore five reasons to choose Webflow for your next web design project before committing to WordPress.
The choice between WordPress and alternatives often comes down to your specific requirements, technical comfort level, and long-term goals. WordPress offers unmatched flexibility and plugin ecosystem, but other platforms might provide simpler workflows for certain types of projects. Take time to evaluate your options before diving into conversion work.
- Assess your long-term content management needs
- Consider your technical skill level and available time
- Evaluate the complexity of your current HTML site
- Research platform-specific features that matter to your project
- Factor in ongoing maintenance and update requirements
Wrapping Up Your HTML to WordPress Journey
Converting HTML to WordPress is definitely a journey, but it's one that opens up incredible possibilities for your website. You've learned about the fundamental process, from setting up your development environment to handling complex dynamic content areas. The key is taking it step by step and not trying to tackle everything at once.
Whether you choose the manual conversion route for complete control or explore automated tools for faster results, you now have the knowledge to make informed decisions about your project. The most important thing is to test thoroughly and remember that perfection isn't the goal on your first attempt. Getting a functional WordPress theme is the priority, and you can always refine and improve it over time.
Converting from HTML to WordPress isn't just about technical implementation, it's about unlocking the power of dynamic content management. Once your conversion is complete, you'll be able to update your site's content, add new features, and grow your online presence without diving into code every time. That's the real value of making this transition.
If you found this challenging or if you're considering other options for your web development needs, know that there are always professionals ready to help. Sometimes the best investment is in expert guidance that gets you to your goals faster and with fewer headaches along the way. Whatever path you choose, you're now equipped with the knowledge to make smart decisions about your HTML to WordPress conversion project!


