How to Link CSS to HTML: A Beginner's Guide to Styling Your Web Pages

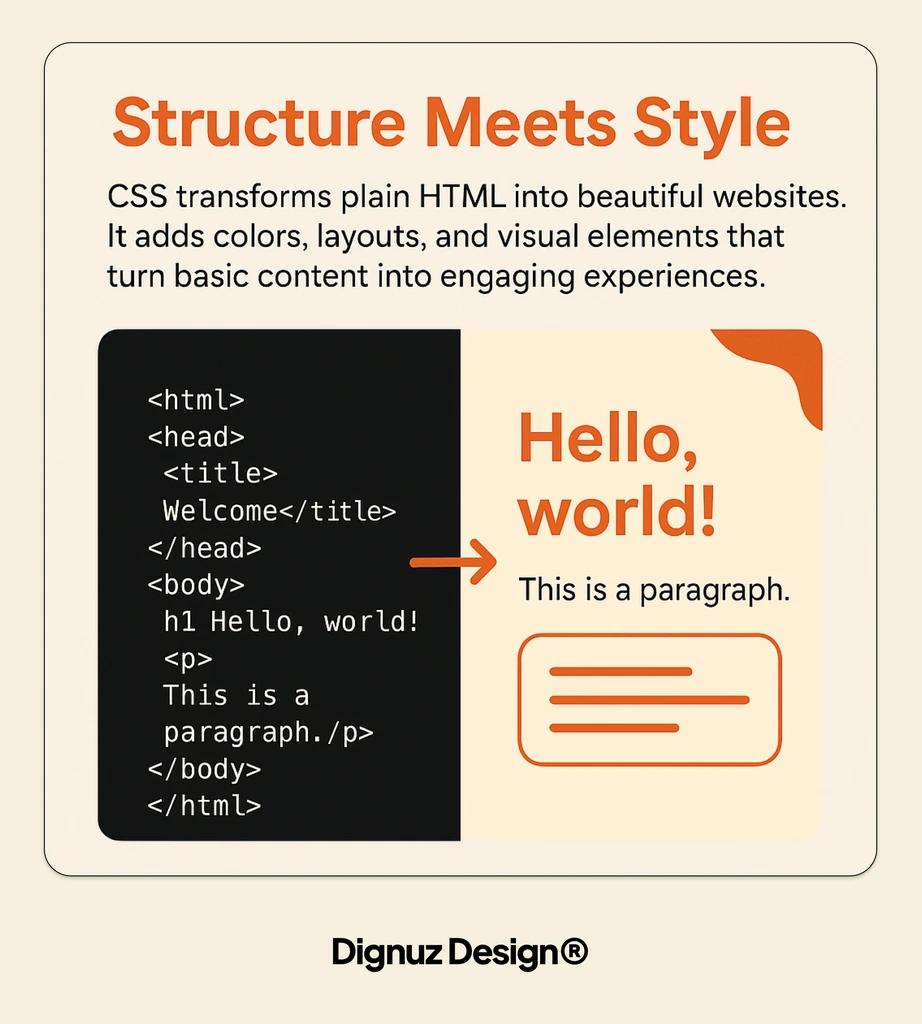
CSS transforms plain HTML into beautiful websites. It adds colors, layouts, and visual elements that turn basic content into engaging experiences. Learning to connect CSS with HTML is your first step toward creating professional web designs.
Think of HTML as the structure of a house. CSS serves as the paint, furnishings, and decorations that make it appealing. Without CSS, websites would appear as plain text with minimal formatting.
This guide explains the three main methods to connect CSS with HTML. You'll learn which approach works best for different situations. We'll also cover best practices and common issues to help you style your pages effectively.
Understanding CSS and HTML Relationship
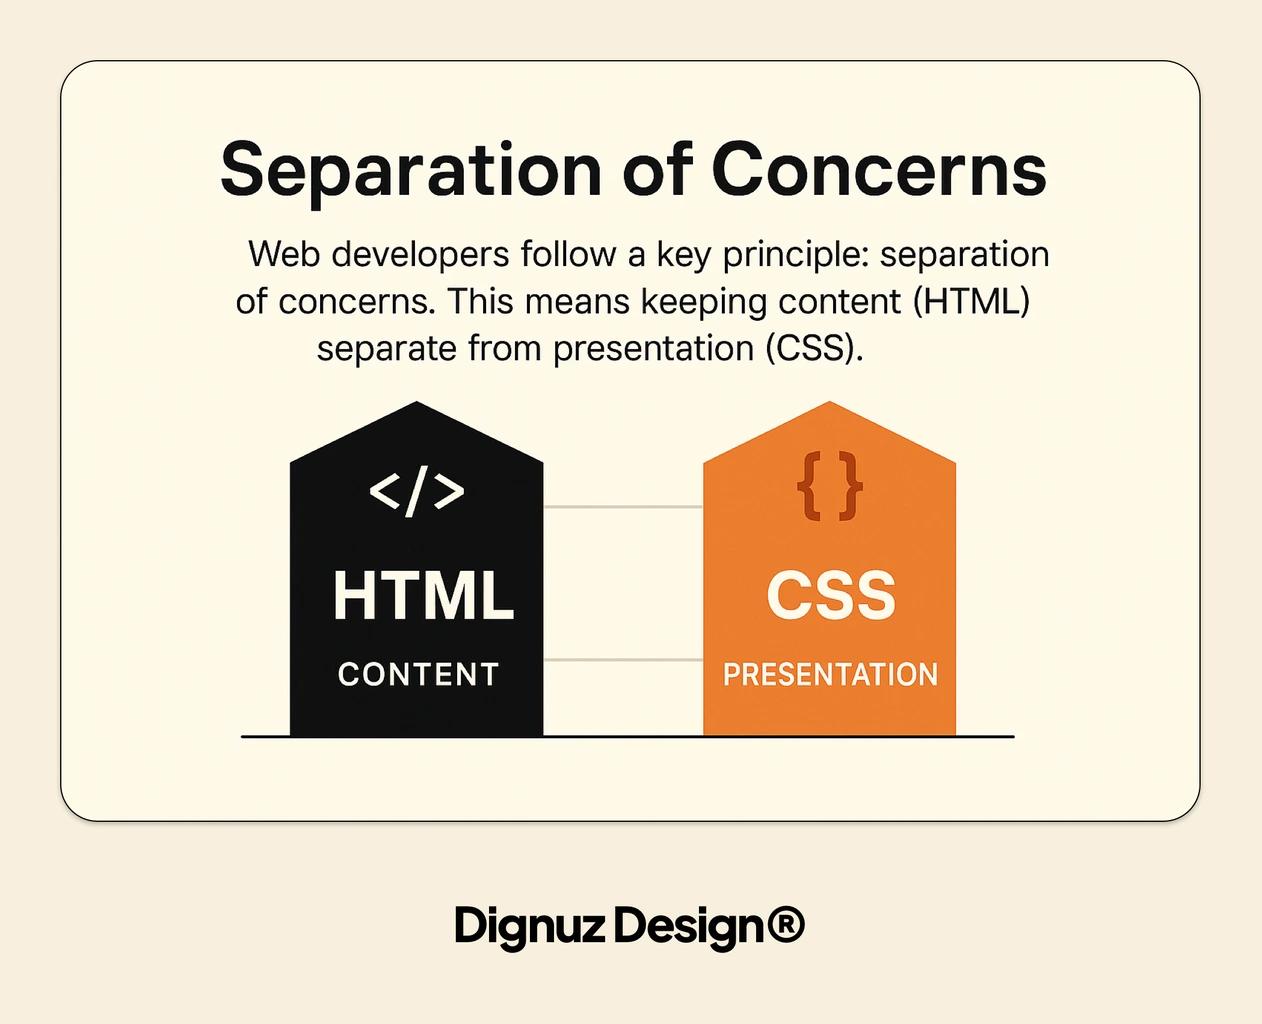
HTML and CSS work together but serve different purposes. HTML creates the structure and content of web pages. CSS controls how that content looks to users. This separation makes website development more efficient.
CSS stands for Cascading Style Sheets. The "cascading" part refers to how styles can inherit and override each other. This powerful feature allows for flexible styling across entire websites.
Web developers follow a key principle: separation of concerns. This means keeping content (HTML) separate from presentation (CSS). Following this principle brings several important benefits to your projects.
Benefits of Separating CSS from HTML
- Improved maintainability - Update the look of your entire site by editing a single file
- Faster page loading - Browsers can cache CSS files, reducing load times for subsequent pages
- Better consistency - Apply uniform styling across all pages automatically
- Cleaner HTML - Your HTML remains focused on content structure without styling clutter
- Responsive design - Implement different styles for various screen sizes more easily
When you separate CSS from HTML, you create more organized code. This approach makes collaboration easier when working with teams. It also simplifies future updates to your website's design.
Methods to Link CSS to HTML
There are three primary ways to connect CSS styles to HTML documents. Each method has specific use cases and advantages. Understanding all three helps you choose the right approach for different situations.
Before diving into each method, let's compare them side by side. This comparison helps you understand their key differences and appropriate uses.
External CSS
- Implementation: Separate .css file linked via <link> tag
- Best For: Multi-page websites, larger projects
- Maintenance Level: Excellent
Internal CSS
- Implementation: <style> tag in HTML document head
- Best For: Single-page websites, page-specific styles
- Maintenance Level: Good
Inline CSS
- Implementation: style attribute on individual HTML elements
- Best For: Single element styling, quick overrides
- Maintenance Level: Poor
Import CSS
- Implementation: @import rule in style tag or CSS file
- Best For: Modular CSS organization, themes
- Maintenance Level: Good
Now let's examine each method in detail to understand how to implement them correctly.
External CSS: Using the Link Tag
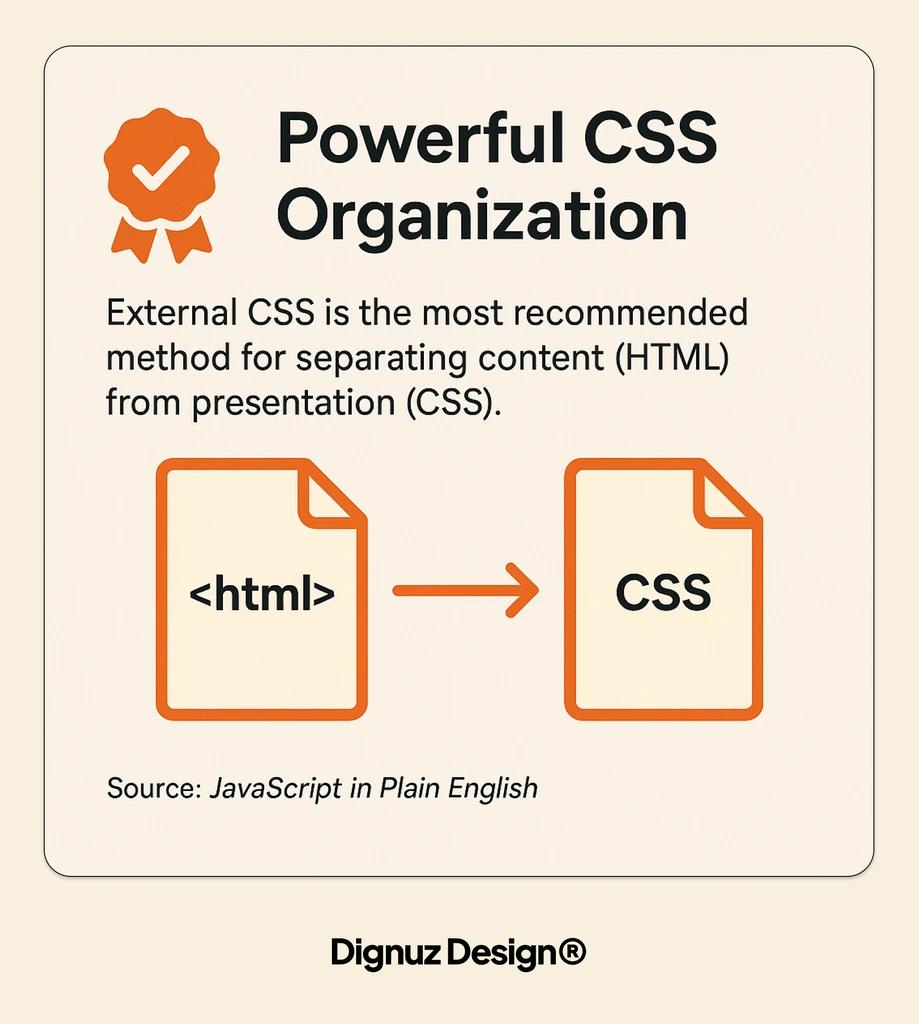
External CSS is the most recommended method for separating content (HTML) from presentation (CSS). This approach stores all your styles in a separate file with a .css extension. (Source: JavaScript in Plain English)
To implement external CSS, you need to create a separate CSS file (e.g., styles.css) and then link to it from your HTML document. The link is placed in the <head> section of your HTML.
Here's how to link an external CSS file to your HTML document:
<!DOCTYPE html>
  <html>
      <head>
        <title>My Website</title>
        <link rel="stylesheet" href="styles.css">
      </head>
    <body>
      <h1>Welcome to My Website</h1>
      <p>This paragraph will be styled according to the rules in styles.css</p>
    </body>
  </html>
The <link> tag contains two important attributes:
- rel="stylesheet" - Tells the browser that the linked file is a stylesheet
- href="styles.css" - Specifies the path to your CSS file
External CSS offers significant advantages for most web projects. It creates a clean separation between content and styling. This separation improves code organization and makes maintenance much easier.
For simple projects, keeping HTML and CSS files in the same directory helps prevent path-related issues. This organization simplifies file management and makes your development process smoother.
The biggest advantage of external CSS is maintenance efficiency. When styles are in a separate file, you can update the design of your entire website by editing just one file. This global control ensures consistency across all pages.
Internal CSS: Using the Style Tag
Internal CSS embeds styling rules directly within the HTML document. This method uses the <style> tag placed in the <head> section. While not as maintainable as external CSS for larger projects, it has specific use cases.
Here's how to implement internal CSS:
<!DOCTYPE html>
<html>
  <head>
    <title>My Website</title>
    <style>
      body { font-family: Arial, sans-serif; margin: 0; padding: 20px; background-color: #f5f5f5; }
      h1 { color: navy; text-align: center; }
      p { line-height: 1.6; color: #333; }
    </style>
  </head>
  <body>
    <h1>Welcome to My Website</h1>
    <p>This paragraph is styled using internal CSS.</p>
  </body>
</html>
Internal CSS works well in certain scenarios. Let's explore when you might choose this method over external CSS.
Why Internal CSS Works Well?
Single-page websites
- No need to manage separate files for simple projects
Email templates
- Many email clients don't support external CSS
Page-specific styling
- Styles that only apply to one page
Demos and prototypes
- Quicker to implement for testing concepts
The main disadvantage of internal CSS is reduced maintainability. When you need to update styles across multiple pages, you must edit each HTML file individually. This approach can lead to inconsistencies and increased maintenance time.
Another drawback is that browsers cannot cache internal CSS between pages. This limitation can slow down your website as users navigate between pages. The styling information must be downloaded with each new page.
Inline CSS: Using Style Attributes
Inline CSS applies styles directly to individual HTML elements using the style attribute. This method places CSS properties directly in the HTML tags. While it provides immediate styling, it's generally not recommended for most styling needs.
Here's how inline CSS works:
<!DOCTYPE html>
<html>
  <head>
    <title>My Website</title>
  </head>
  <body>
    <h1 style="color: navy; text-align: center;">Welcome to My Website</h1>
    <p style="font-family: Arial; line-height: 1.6; color: #333;">This paragraph is styled using inline CSS.</p>
  </body>
</html>
Inline CSS has the highest specificity of all CSS methods. This means it will override conflicting styles from external or internal stylesheets. This characteristic makes it useful for quick overrides or exceptions to general styling rules.
Despite this advantage, inline CSS should be used sparingly. Let's examine why:
Mixes content with presentation
- Violates separation of concerns principle
Reduced maintainability
- Requires editing every instance to change styles
Code bloat
- Increases HTML file size and reduces readability
No reusability
- Styles cannot be shared between elements
Appropriate uses for inline CSS include:
- Email HTML where external CSS might not be supported
- Quick testing or debugging of styles
- One-time style overrides for specific elements
- Dynamically generated styles from JavaScript
For most web development scenarios, rely on external CSS for the bulk of your styling. Use inline CSS only for exceptional cases where its specificity is genuinely needed.
Best Practices for CSS Organization
Organizing your CSS effectively improves development efficiency and maintainability. Well-structured CSS makes it easier to find and modify styles as your project grows. Let's explore key practices that professional web developers follow.
File organization plays a crucial role in CSS management. For basic websites, keeping HTML and CSS files in the same directory simplifies path references and prevents linking errors. As projects grow larger, consider organizing CSS into multiple files with a logical folder structure.
Here's a recommended file structure for different project sizes:
Small (1-5 pages)
- Recommended Structure: Single styles.css in root directory
- Benefits: Simple management, easy to find
Medium (6-20 pages)
- Recommended Structure: /css folder with main.css and pages/*.css
- Benefits: Organized by purpose, manageable size
Large (20+ pages)
- Recommended Structure: Component-based CSS architecture
- Benefits: Modular, team-friendly, scalable
Complex applications
- Recommended Structure: CSS methodology (BEM, SMACSS, etc.)
- Benefits: Prevents conflicts, improves maintenance
Naming conventions help create predictable, easy-to-understand CSS. Consider these approaches to naming your CSS classes and IDs:
- Descriptive names - Use names that describe purpose (e.g., .main-navigation) rather than appearance (.blue-box)
- Consistent formatting - Choose kebab-case (e.g., .main-header) or camelCase (e.g., .mainHeader) and stick with it
- Component-based naming - Group related elements (e.g., .card, .card-title, .card-image)
- Namespace prefixes - Use prefixes for different areas (e.g., .l- for layout, .c- for components)
Many web design agencies like ours have found that organizing CSS properties in a consistent order within each rule makes code more readable. We typically follow this pattern in our projects:
.element {
  /* Positioning */
  position: absolute;
  top: 0;
  right: 0;
  /* Box Model */
  display: block;
  width: 100px;
  height: 100px;
  margin: 10px;
  padding: 10px;
  /* Visual */
  background-color: #fff;
  border: 1px solid #000;
  border-radius: 5px;
  /* Typography */
  color: #333;
  font-family: Arial, sans-serif;
  font-size: 16px;
  text-align: center;
}
When you need to update the design of your website, external CSS allows you to edit a single file rather than modifying each HTML page individually. This approach significantly reduces maintenance time and helps prevent inconsistencies across your site.
Common CSS Linking Issues and Solutions
Even experienced developers encounter problems when linking CSS to HTML. Understanding common issues and their solutions helps you troubleshoot effectively. Let's examine the most frequent challenges and how to resolve them.
Broken links due to incorrect file paths in <link> tags are a frequent issue when implementing CSS. When your styles aren't applying, the path to your CSS file is often the culprit.
Here are common file path mistakes to avoid:
- Missing or extra slashes - Correct: "css/styles.css" or "/css/styles.css" (depending on context)
- Incorrect relative paths - Using "../" when unnecessary or forgetting it when needed
- Case sensitivity issues - "Styles.css" vs. "styles.css" (matters on some servers)
- Typos in filenames - "style.css" vs. "styles.css"
- Wrong file extension - Using ".css" vs. ".CSS" or ".txt"
The table below outlines common CSS linking problems and their solutions:
CSS not loading at all
- Symptoms: Unstyled page, browser console shows 404 errors
- Solution: Check file path, verify file exists, check filename case
Some styles not applying
- Symptoms: Partial styling, inconsistent appearance
- Solution: Check CSS specificity issues, inspect elements in browser tools
Styles work locally but not on server
- Symptoms: Works on development machine but not when uploaded
- Solution: Check case sensitivity, verify file permissions on server
CSS changes not appearing
- Symptoms: Website shows old styles despite updates
- Solution: Clear browser cache, use cache-busting techniques
Browser caching can sometimes prevent updated CSS from appearing. When you make changes to your CSS file, browsers might continue using the cached version. To force a refresh, you can:
- Add a version parameter to your CSS link: <link rel="stylesheet" href="styles.css?v=1.1">
- Use browser development tools to disable caching during development
- Perform a hard refresh (Ctrl+F5 or Cmd+Shift+R)
- Implement proper cache control headers on your server
When working with multiple CSS files or frameworks, conflicting styles can create unexpected results. Understanding the cascade and specificity rules helps resolve these conflicts. Remember that inline styles override internal styles, which override external styles (unless specificity or !important rules change this behavior).
Advanced CSS Integration Techniques
Once you've mastered the basics of linking CSS to HTML, you can explore advanced techniques that enhance your styling capabilities. These methods help create more dynamic, responsive, and maintainable websites.
CSS variables (officially called custom properties) allow you to define values once and reuse them throughout your stylesheet. This feature makes global updates easier and creates more consistent designs. (Source: nerdy.dev)
Here's how to implement CSS variables:
:root {
  --primary-color: #3498db;
  --secondary-color: #2ecc71;
  --text-color: #333;
  --heading-font: 'Roboto', sans-serif;
  --body-font: 'Open Sans', sans-serif;
}

h1 {
  color: var(--primary-color);
  font-family: var(--heading-font);
}

p {
  color: var(--text-color);
  font-family: var(--body-font);
}

.button {
  background-color: var(--secondary-color);
  color: white;
}
Media queries enable responsive design by applying different styles based on device characteristics like screen width. This approach ensures your website looks good on all devices from mobile phones to large desktop monitors.
Here's a basic responsive design implementation:
/* Base styles for all devices */
body {
  font-size: 16px;
  padding: 20px;
}

/* Styles for tablets */
@media (max-width: 768px) {
  body {
    font-size: 14px;
    padding: 15px;
  }
}

/* Styles for mobile phones */
@media (max-width: 480px) {
  body { font-size: 12px; padding: 10px; }
}
Data attributes provide a way to store custom data attributes that can be styled with CSS. This technique is useful for creating dynamic UI elements without adding unnecessary classes. (Source: nerdy.dev)
Example of styling with data attributes:
<!-- HTML with data attributes -->
<button data-status="active">Active Button</button>
<button data-status="disabled">Disabled Button</button>

/* CSS targeting data attributes */
button[data-status="active"] {
  background-color: green;
  color: white;
}

button[data-status="disabled"] {
  background-color: gray;
  color: #ddd;
  cursor: not-allowed;
}
Here are advanced CSS optimization techniques that improve performance:
- CSS minification - Removing unnecessary characters (spaces, comments) to reduce file size
- Critical CSS extraction - Inlining critical styles for above-the-fold content
- Lazy loading CSS - Loading non-critical styles after the page renders
- Reducing unused CSS - Removing styles that aren't applied to any elements
- CSS splitting - Breaking CSS into multiple files loaded only when needed
CSS frameworks and preprocessors can simplify development while maintaining clean HTML-CSS separation. Options like Sass, Less, or Stylus add features like nesting, mixins, and functions to make your CSS more powerful and maintainable. (Source: Meyer Web)
Testing Your CSS Implementation
Proper testing ensures your CSS works correctly across different browsers and devices. A systematic approach to testing helps catch styling issues before they affect users. Let's explore essential testing methods and tools.
Cross-browser testing verifies that your CSS renders consistently across different browsers. While modern browsers have improved standards compliance, variations still exist. Test your website in multiple browsers to ensure a consistent experience. (Source: YouTube)
Follow this browser testing checklist:
- Test in major browsers - Chrome, Firefox, Safari, Edge
- Check different versions - Current and previous major versions
- Verify on operating systems - Windows, macOS, Linux
- Test responsive breakpoints - Desktop, tablet, mobile sizes
- Check orientation changes - Portrait vs. landscape on mobile devices
Several tools can help streamline your CSS testing process:
CSS Validators
- Examples: W3C CSS Validator, CSSLint
- Purpose: Check for syntax errors and potential issues
Browser Testing Platforms
- Examples: BrowserStack, Sauce Labs, LambdaTest
- Purpose: Test on multiple browsers and devices
Developer Tools
- Examples: Chrome DevTools, Firefox Inspector
- Purpose: Inspect and modify CSS in real-time
Responsive Testing Tools
- Examples: Responsive Design Checker, Sizzy
- Purpose: View your site at different screen sizes
Browser developer tools are essential for CSS debugging. They allow you to inspect elements, view applied styles, and make temporary modifications to test changes. Most browsers include these tools built-in, accessible by right-clicking and selecting "Inspect" or pressing F12.
Common CSS issues to check during testing include:
- Layout shifts when resizing the window
- Text that overflows its container
- Inconsistent spacing or alignment
- Elements that disappear or render incorrectly
- Colors or fonts that don't match the design
Performance testing is another crucial aspect of CSS evaluation. Large or poorly optimized CSS can slow down your website. Use tools like Google PageSpeed Insights or Lighthouse to identify CSS performance issues and receive optimization recommendations.

Conclusion
Linking CSS to HTML effectively forms the foundation of modern web design. The three main methods—external, internal, and inline CSS—each serve different purposes in your development workflow. For most projects, external CSS provides the best balance of maintenance, performance, and organization.
Remember these key takeaways:
- External CSS is ideal for most websites, especially multi-page projects
- Internal CSS works well for single-page sites or page-specific styles
- Inline CSS should be limited to specific use cases or dynamic styling
- Properly organized CSS improves maintenance and collaboration
- Test your CSS implementation across different browsers and devices
As you continue developing your web design skills, explore more advanced CSS techniques like flexbox, grid layouts, and animations. These powerful features build upon the fundamental linking methods covered in this guide.
If you're working on a real estate website and need professional web development services, consider how custom website design can help your property listings stand out from the competition. A well-designed website with thoughtful CSS implementation creates an engaging experience for potential buyers.
Have you ever wondered why choose Webflow for your web design projects? The platform offers exceptional design flexibility while maintaining clean code and proper CSS implementation.
For real estate professionals looking to create luxury website design experiences, proper CSS styling is essential to convey elegance and sophistication. The principles covered in this guide form the foundation for creating those premium digital experiences.
Ready to take your web design skills further? Start by mastering these CSS linking techniques and then build upon that foundation with more advanced styling concepts. With powerful integrations that extend functionality, modern websites can combine beautiful styling with robust features.
Need Help With Your Web Design Project?
Dignuz Design specializes in custom website design and development for real estate professionals. Contact us today to discuss how we can help create a stunning online presence for your properties.